Sunday, November 24, 2013

Punch transfer technique

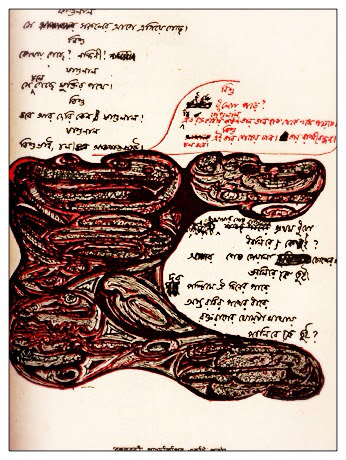
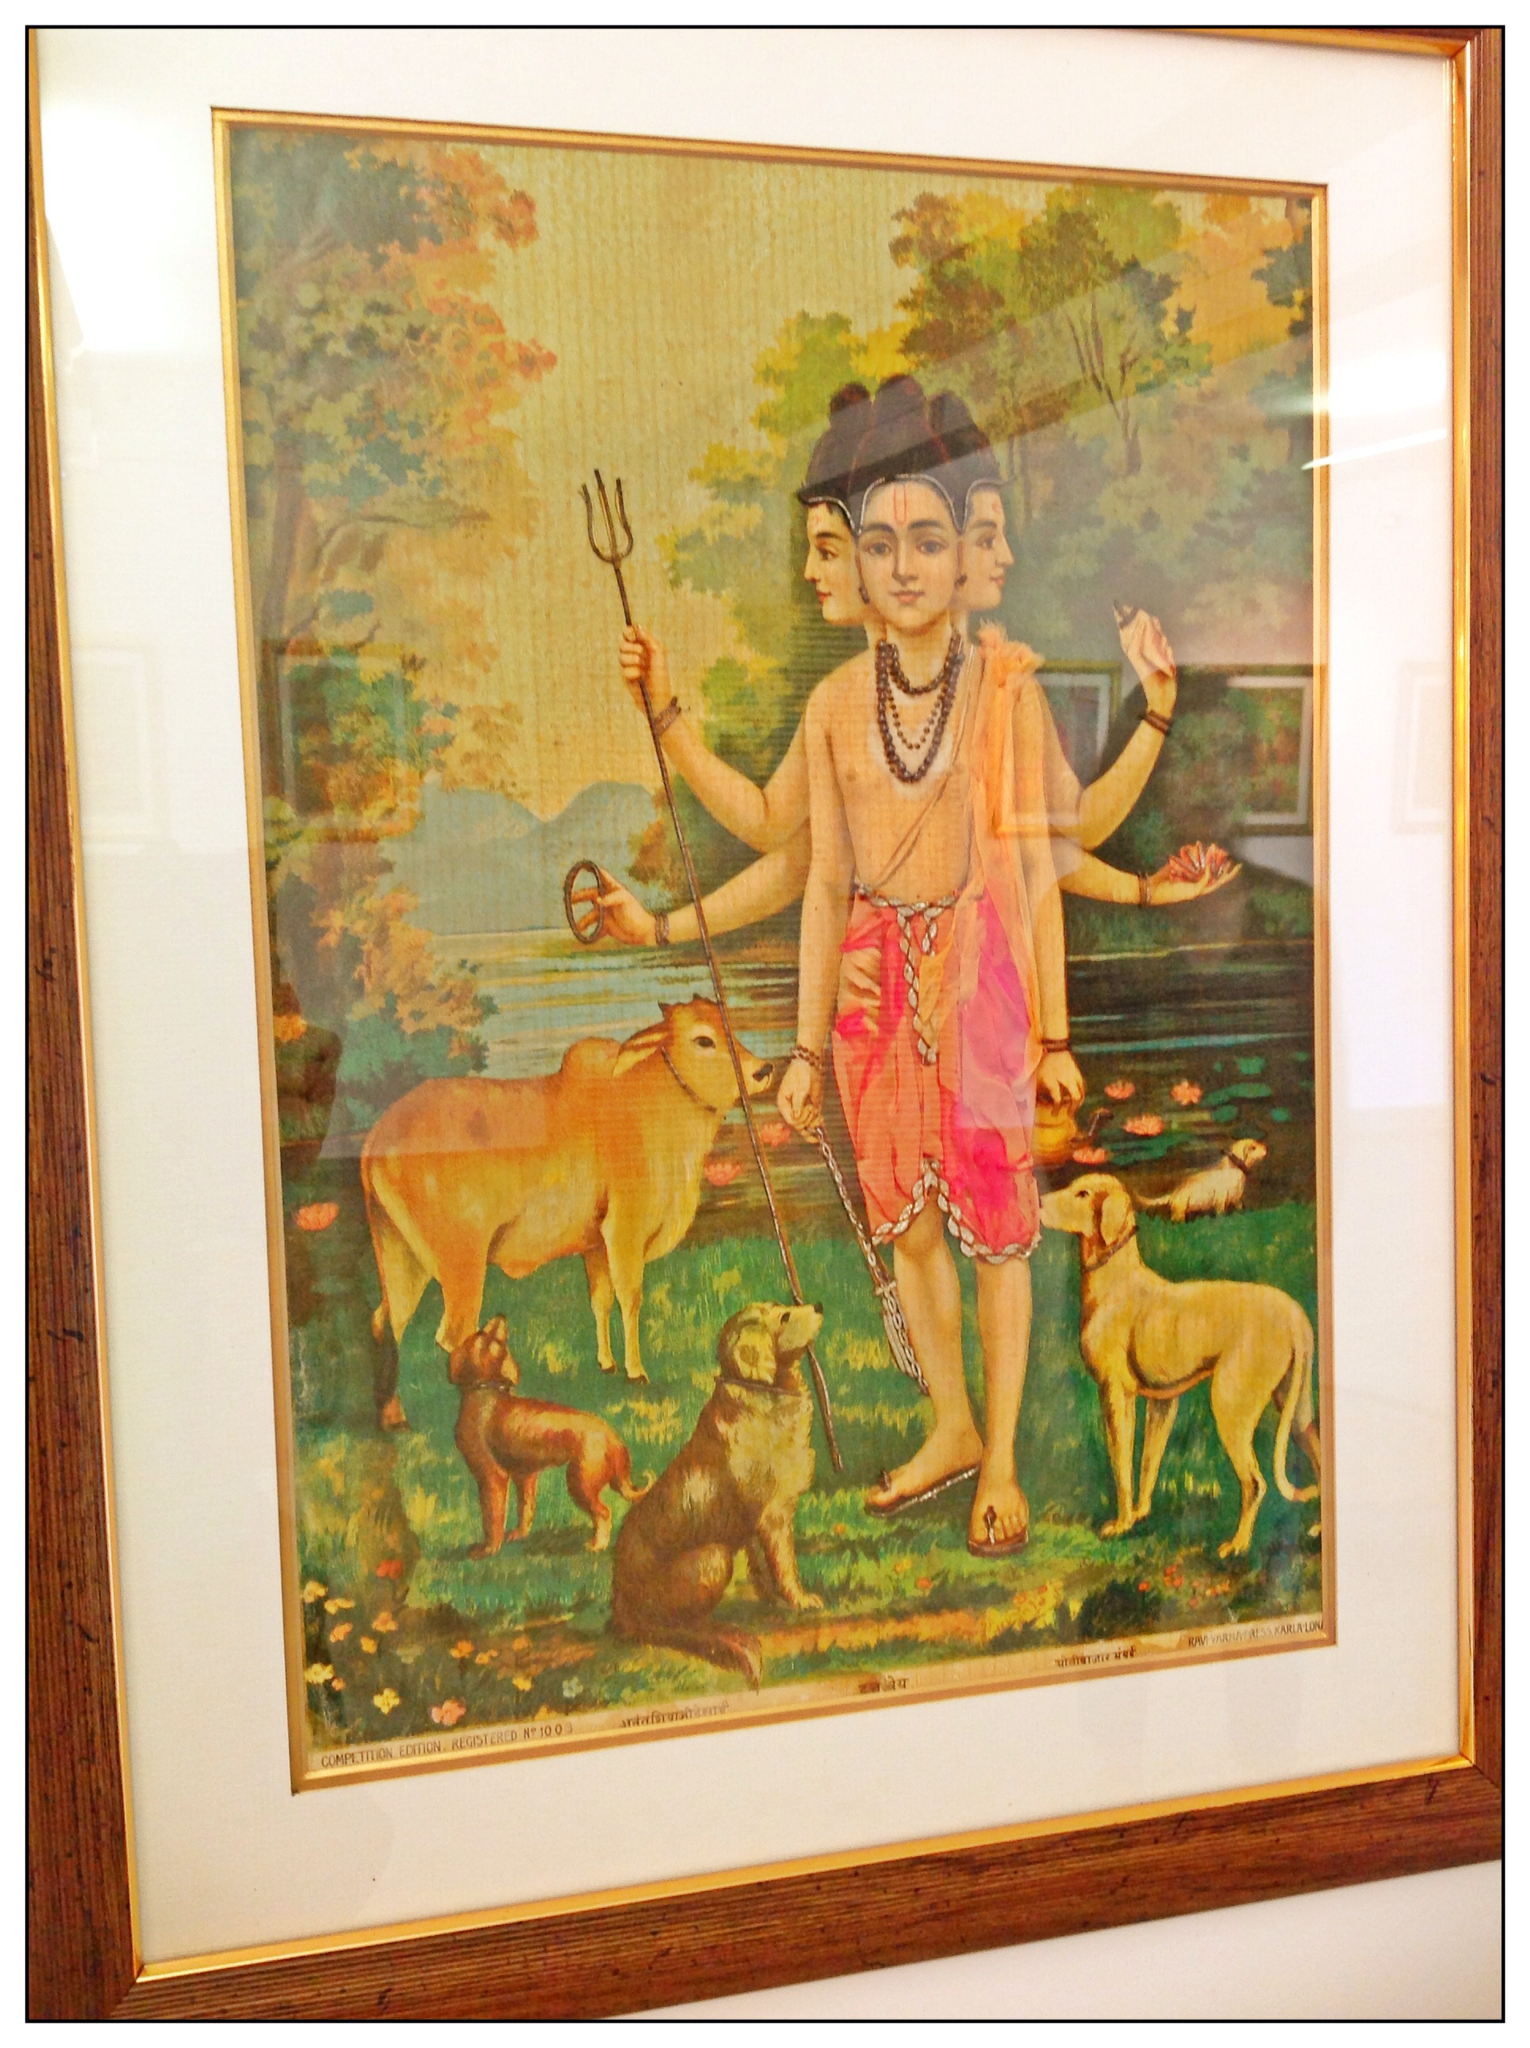
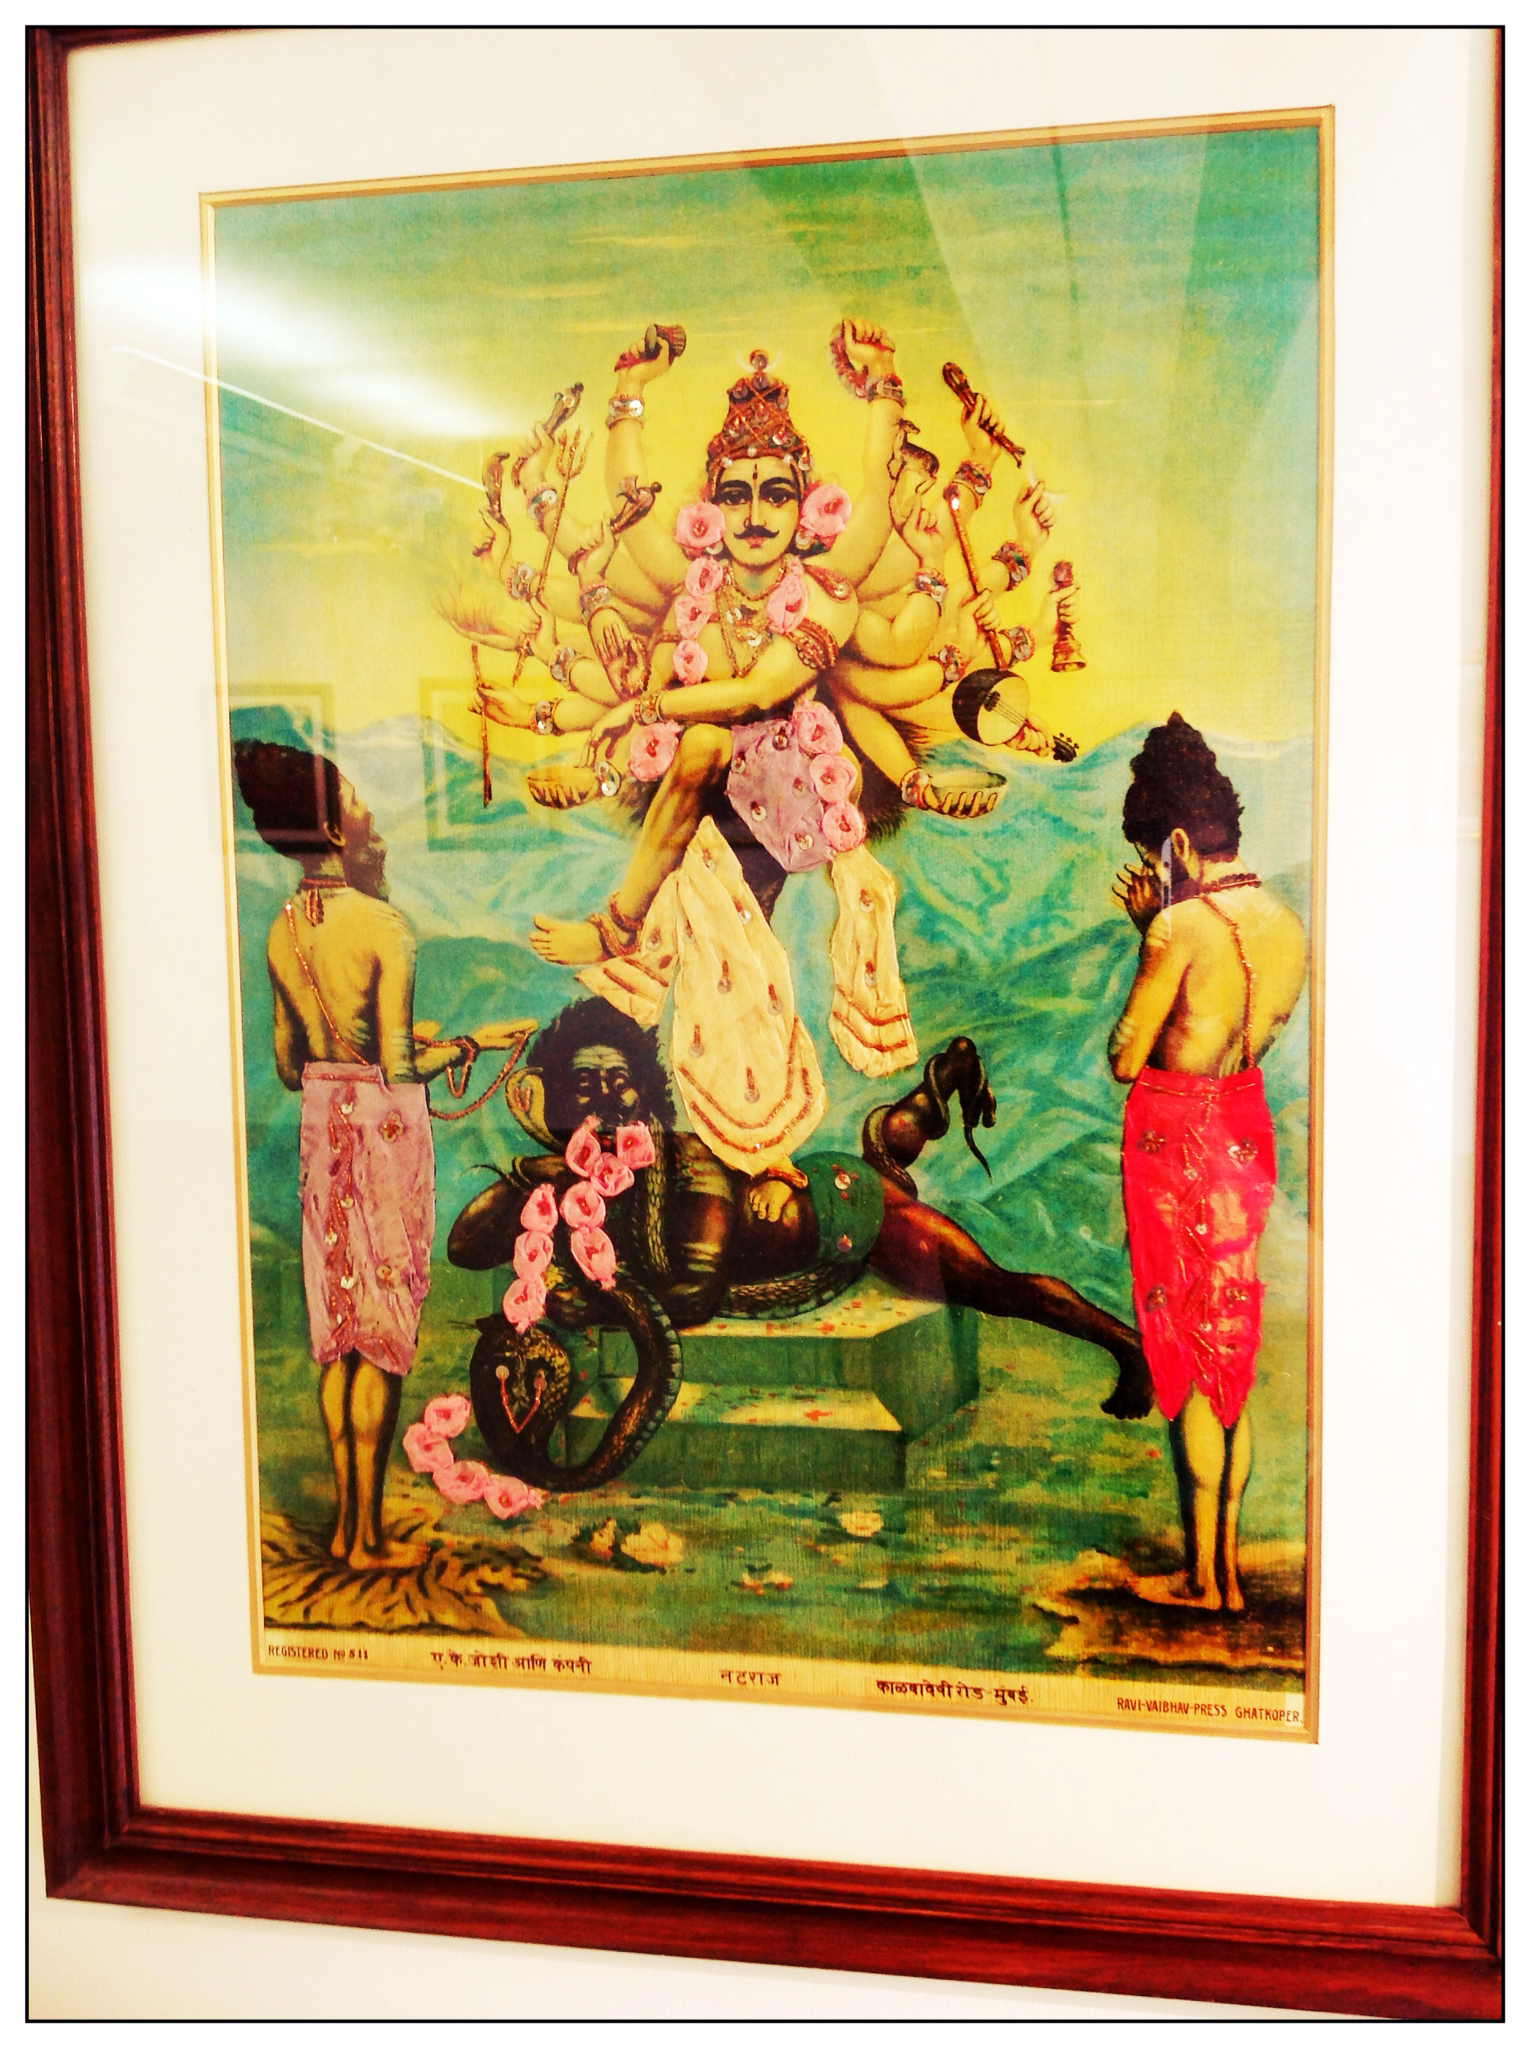
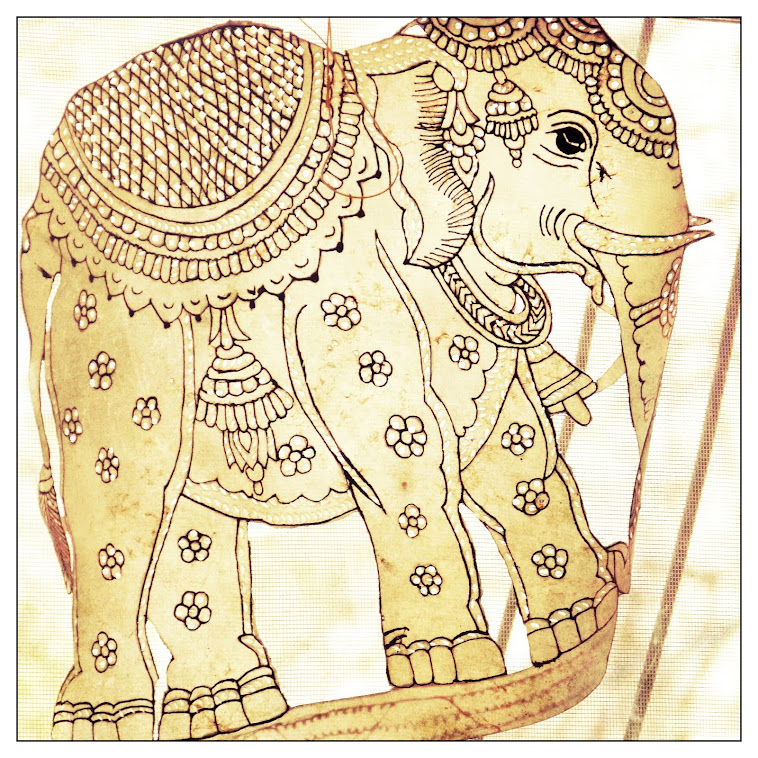
In an old book about Indian miniatures I came across this ancient method of transferring an image...and I found it fascinating. It's a stencil of sorts, but would be fun to do with kids since it doesn't involve complicated positives and negatives, rather it's a fairly straightforward way of copying images, with no limitations on how complex the original image is.

The act of copying things has become such a non-issue for kids growing up surrounded by xerox machines and in-home color printers and copiers that I think it's fun to point out that it wasn't always this simple. Entire art forms have been invented for the purpose of making copies. I have alway enjoyed teaching children rudimentary ways of copying images, from covering the back of a page with graphite or pencil lead and then tracing over the image to on front (homemade carbon paper), to actual carbon paper--stacks and stacks of it for multiple images, and, of course, printmaking. But this punch transfer is new to me.

Offer kids a darning needle, toothpick, or drypoint tool and challenge them to punch holes along the important lines of a drawing or a photograph. With a new piece of paper underneath, use a bit of ground up charcoal, colored pastel, or tempera powder and rub gently on top of the image, making sure it doesn't move until entire image is covered. Then connect the dots on the paper underneath. It could be fun to make multiple copies, overlap images, even thread a needle and make stitches in the original punched paper. Many of the shapes in the original could probably be punched out and used for collage. This could be a fun one-off project for exploring and experimentation in between projects, or it could turn into something bigger. I always enjoy being honest with the kids when I'm trying something new, and encourage everyone to jump in and brainstorm about possibilities.


Thursday, October 31, 2013

Elephant bells

It's hard to imagine losing an elephant, but a common practice among elephant owners--'mahouts'--is to let their elephants forage freely at night in the jungle. This leaves the problem of how to find the creatures the next day. Elephants wear bells so they can be found. Elephant bells tend to be large, and ornate.

Kids enjoy making 'real', useful objects in art, and an elephant bells project would fit nicely into several different kinds of units. It would be fun to make large bells out of clay, with a hole inside the bell body, as well as in the separately made 'clapper' (the piece inside), that could be attached later using wire or string. Include a hole or handle on top so the bell can hang from something. Use the sgraffito method to scratch patterns and designs on the outside before firing. Alternatively, it could be a fun challenge to make bells out of found objects, silverware, bowls, cans, etc. these objects could be used as forms for paper mâché or embossed tinfoil, painted (add glue to paint to help it stick), or strung together as is.


Wednesday, September 4, 2013

Painted Elephants

Elaborately decorated elephants are used in festivals throughout India. There's some deserved controversy over the treatment of these celebrated animals--but many believe that it is precisely this elevated status that keeps farmers and other folk from killing elephants that destroy their crops. The way these creatures are used as canvases for decoration really is stunning though--and can be used to inspire some incredible art--thanks to the remarkable combination of observation and fantasy.
In my kindergarten class we looked at a photograph of an elephant and made a list of words and phrases that described how we knew it was an elephant. In the picture we studied we noticed that the trunk stretched all the way to the ground. Children made pratice outlines with their fingers to plan their drawings and all the animal parts, then were given black crayons and invited to fill their canvases with elephants. When/if their crayons touched the edge of the paper they were allowed to say 'bump' out loud. It was a great incentive, and the room soon filled with the sound of 'bumps' and the sight of enormous elephants. Black and white paint was offered and children mixed the colors right on the board. Then detail brushes, white paint and other bright colors were introduced, and eventually other embellishments (sequins, tassels, buttons, etc) were offered, and applied with matte medium.
This would work well with older children as well. Invite debate about the controversy (including a reference to the street artist Banksy's use of a live, painted elephant in a recent exhibit in Los Angeles), and inspire them to choose an animal to decorate accompanied by a statement explaining their decision.

Wednesday, June 26, 2013

Leather puppets from Andhra Pradesh

These often jointed puppets are made using colored inks on perforated goat skin leather. They are beautifully detailed and colored, and when light shines through the holes (there are many--if you look closely at these pictures, every dot and circle is a hole), they look like jewels. They are used as shadow puppets, and because of the translucent nature of the goat skin leather the colors end up showing. The elephant on the top of this blog page is also one of these 'puppets'--though it doesn't have jointed parts.

In the spirit of using the goat hide, it would be good to use an upcycled or recycled material to make our own puppets. Ironing together plastic bags (instructions below*) creates a great translucent surface that could easily be cut with scissors, punctured using a needle, or a hole punch, and colored sharpies could be used to decorate these. Recycled cardboard boxes (cereal boxes or cracker boxes, etc) could be used, if translucency is not desired. Alternatively white paper could be glued to something like rice bags or lightweight cloth bags ahead of time (using watered down white or pvc glue) to create a durable and flexible material that would retain some translucency. Joints are attached to the main body with knots of thread, but 'brads' or brass fasteners could be used as well.

Encouraging children to think about what moves, what bends, and what doesn't bend can be a great way to begin this project. Have a child put left hand on right wrist and feel the joint as it moves up and down, next put left hand on right elbow and feel that joint as it moves, then shoulder, etc. show children how to draw separate parts so they fit on one sheet of 'paper' so there isn't too much waste. Color, then cut and assemble.

Children could choose different characters from a familiar story or play as a prompt--in which case it should be considered which movements would be crucial to the story (ie if someone's main action is chopping wood he might not need legs that bend). They could also work on their own individual animals, after some lively discussions about animal actions and unique features.

Detail, showing perforation
A lamp shade, made using the same materials and techniques
Puppet show, in action
 

*to iron plastic bags, trim off handles and bottom of bags, layer four bags together, smoothed out, between two larger pieces of paper, iron (on medium) continuously, no stopping, until bags are fused together. Do this outside or in a well ventilated area as there will be fumes.


Tile Mural by Khemraj, Rajasthan

Potter Khemraj combines contemporary imagery with traditional technique in a 'stacked' bas relief mural showing a village being consumed by the modern aspects of a larger town. This could be a fun subject for a mural for children, showing some new aspect of technology impacting life as we know it...each child works on a different tile but makes sure that horizontal lines match up for consistency. Children work on square slabs, using coils and clay 'buttons' and other basic hand building techniques to create their scenes. To achieve this raw, weathered, feeling, bisque-fired tiles can be dipped in black glaze, then scrubbed so glaze only lingers in the grooves and edges, before the final firing.


Sunday, June 23, 2013

Terra cotta horse mural project


These large horses were created by villagers in Tamil Nadu so that the protector Aiyanar (the guardian of the fields) could ride them at night to chase away evil demons, thereby ensuring good luck for the town and harvest. Different horses from different areas were decorated with different types of objects and creatures. Smaller sections were created on the wheel, fired separately, and then attached to make these life sized creatures.

In an earlier post I mentioned ideas for individual projects responding to these giant horses, but I just learned about this website, that turns images into large scale half-tone pictures that can be printed out on multiple sheets of regular paper to create an enormous mural. It could be fun to run this image, or a picture of a regular horse, through this process, and invite kids to decorate the different horse sections using either red or brown paint on day one and detail brushes and black paint on another day, or any other material, like black marker for the decorations and pastels for everything else. This is also in keeping with the manner in which the actual sculptures were pieced together by members of the community, so there's a nice symmetry to doing it this way.


Tuesday, March 19, 2013

Clay-relief Sculptures of Sarguja


Every year after harvest there is a big festival called Chherta where every house is repaired, whitewashed, and freshly decorated with clay reliefs...women try to outdo each other to make their houses the most attractive. These become incredibly vivid 3-D murals with characters half on/half off the wall, other materials like string and wire are added as well. Whitewashed backgrounds have radiating and/or swirled-line grooves that the women make using their fingers.

For individual project panels, children could create backgrounds using white paint on cardboard, swirling their fingers in smooth strokes to create a similarly textured canvas...(tempera or acrylic paint could be thickened with cornstarch or gel medium to hold the texture). In a subsequent class they could create characters using a theme like 'playing with friends' or 'climbing a tree.' Construction paper collage would work but shouldn't be glued down to the background all the way, as some 3-D effect best captures the real thing. True 3-D with paper mâché pulp or model magic would be great. Either way, found elements like string and wire should be incorporated.

This would make a great mural project as there can be multiple work areas, and everyone doesn't have to be standing at the mural at the same time. Real whitewash can be used, its lack of true opacity and its affordability, not to mention its authenticity, would be great. A collaborative mural wherein children from different classes and grades contribute their 3-D objects and they are attached to the wall by a teacher or by an older class would work nicely.


Click here for a video tour of the mural:


Saturday, March 16, 2013

Maru potters of Rajasthan

The Maru potters did not believe, as some cultures did, that deities reside in stone but rather in clay because of the nature of its elements. They believe a pot is like a person in that there is a birth and a death (the inevitable break), and that a broken pot will eventually return to nature, as people do. Likewise, they believed that a good potter perspires when he kneads wet clay which means potter and clay permeate each other and become one. The clay becomes infused with the potter, the potter takes on elements from the clay as well. In some villages the potters are also priests, taking the respect for this profession and its proximity to the life and death cycle to another level entirely.

This is not an art lesson idea as much as an invitation to rethink how clay is presented. In every clay program children are taught to pound and work the clay in a rough manner in order to prevent air bubbles which could cause items to explode in the kiln. The kneading is billed as being necessary in order to prevent something bad from happening, not as something beneficial in its own right. I think it would be a great visual for clay-workers of any age to have when conditioning their own clay--imagining that the true goal is to become 'one with the clay' through the hard work of kneading and pounding. In fact, now that I know this reason for wanting sweat to mingle with clay, it seems like a wasted opportunity if a potter's only goal is such a mechanical one.

Here he is in action, mixing lots of sand into the clay, as well as mica. The clay is fired in a outdoor kiln at about 650*F.


Friday, March 15, 2013

Bandhani tie-dye

Tie-dye is a common technique with an almost magical element of surprise when the twisted, knotted piece is unravelled and the colors and patterns are revealed.

Bandhani (means 'to tie' and is the origin of the word bandana) fabrics are knotted with hundreds of little knots, sometimes at random, sometimes along a washable blue stencil. Traditionally the women tie the knots, and whisper secrets or share stories while they tie them. Later when the fabric has been dyed (by men) and unknotted, by simply tugging it open, the woman (often a bride) who wraps herself in it is essentially cloaking herself in women's experiences. The knots are made by pinching little bunches of fabric together and then wrapping thread around the bunch many times, some women can tie as many as 700 knots in a day. When Bandhani are sold, the knots are left in so the buyer can be sure she isn't purchasing a fake.

Introducing this technique as part of any tie-dye lesson or activity would enrich the experience of preparing the fabric to be dyed. These secret-bearing knots could be one option alongside more common twists and rubber bands. In fact, introducing the idea of attaching secrets or stories (by giving voice to them as you work) to any kind of tie-dye preparation be it regular strings or rubber bands, thereby infusing the end product with such importance, would be a wonderful and memorable practice. In keeping with the communal gift nature of the process though, an entire class could work together on a large piece of fabric, while reminiscing about childhood memories or experiences from that year in school. The resulting fabric could be given then, as a gift to a departing teacher, or other important figure from their shared experience.

Tuesday, March 12, 2013

Kolams (Rangoli)

In Pondicherry in the south of India, women decorate the ground in front of their house every morning with designs called kolams. They use a mixture of rice flour and pigment and use templates or work freehand. It was believed that it was important to always have a welcoming home, and the fact that creatures like birds, squirrels, and ants would eat the rice flour was a part of this idea of providing an inclusive environment (also Lakshmi, the goddess of posterity might show up!). As the day goes on the kolams are trampled and the artwork disappears and then the next morning the women sweep and wash the ground (sprinkling it with water) and reapply them, making a brand new design each day. It is important that every line is closed, to prevent evil spirits from entering. Women stand up, but bend over the entire time they create, and so it's considered to be good for digestion, reproductive organs, and a good form of morning exercise and stretching. Modern templates are made by using blue block-out on silk screen-like screens (round) or by punching holes in tins...a handful of rice flour goes in the tin and when the tin is tapped on the ground the pattern comes out. Fancy borders are made using tubes that have holes punched in them..traditionally they were made out of (clay or) tin but the ones I saw from Pondicherry were just thin lengths of PVC piping. The little tubes are packed with rice flour and then rolled on the ground to make patterns for the borders.

We could replicate the tin stencils by punching holes in sturdy paper plates. And thin cardboard tubes (the kind that come with wrapping paper) would be great for rolling borders. This could be a fun and meaningful school art project, if teams of children were to be assigned the front of the school from one day to the next. It's a nice step up from sidewalk chalk, and would also be a wonderful introduction to the idea of impermanence in artwork. Design and pattern suggestions can be found at http://www.ikolam.com/

Here are the stencils:

This is what it looks like when the rice flour is pressed through:


Monday, March 11, 2013

Tagore Doodles

Painting didn't come easily to Nobel prize for Literature winner Rabindranath Tagore though he worked at it for a long time. He did however make a habit of turning his written mistakes, cross outs, etc into elaborate drawings and doodles as he wrote. "He turned struck-out words into ornamental motifs and sometimes linked the scratched out words on the pages of his manuscripts into an art-nouveau-like arabesque .....Victoria Ocampo who spotted these during his stay in Argentina as her guest was impressed and found artistic merit in them. "He played with erasures,‟ she wrote, "following them from verse to verse with his pen, making lines that suddenly jumped into life out of this play: prehistoric monsters, birds, faces appeared.‟'* Tagore went on to be recognized as a great painter, and was the first Indian artist to have artwork displayed around the world.

*Current Exhibitions Upcoming Exhibitions Past Exhibitions. "Rabindranath Tagore: The Last Harvest | New York". Asia Society. Retrieved 2012-12-18.

As a way to acknowledge and reconcile our own inevitable 'mistakes and cross-outs' I think it would be great to collect them in the art room as the year goes by, or encourage other teachers to contribute, and have children choose 'a mistake' to use as a starting point for any type of artwork, depending on the materials at hand and the time frame. It could be the community scrap bin that kids turn to when they finish with something else or they could be distributed randomly and incorporated into paintings or collages, sketches, etc. imagine a whole display of artwork made from other people's mistakes or false starts. It sends a good message about upcycling as well.


Thursday, March 7, 2013

Gond painting


The Gond people believe that viewing a good image brings you good luck so it's no surprise that their paintings are so joyful. They make the paintings on the walls of their houses to mark special occasions and only recently started to paint on paper with poster paints. Animals and nature scenes dominate these paintings, which consist of a simple single color shape filled with dots and lines described here as being: like undulations of song, like fables within tales, colourful dots and lines chase each other in close succession. Immense patience and delicate brush strokes are part of the meditative process. The Gond tribe was known for storytelling and song, and a connection could be made between that and the rhythmic energy of their heavily patterned artwork. One artist I spoke to told me the inspiration for the dots and dashes that fill the animals is rice, and the article I linked to above says they are evocative of the tattoos on the Gond women. The simple graphics combined with intricate patterning and vibrating colors provide instant inspiration for artists of all ages.
 
After outlining their animal shapes with pencil, children should choose one main color in acrylic or tempera paint to fill them in. Good quality markers or sharpies could be used for the patterning, or detail brushes and paint in both bright colors, black, and white. This could also be a great collage project, a photograph of an animal could be traced and cut out of fadeless paper or traced once onto multiple layers of colored tissue papers. Once those papers have been glued to a white background, acrylic paint can be added with a detail brush or toothpick. Dots, lines, and dashes can be used or students could think of a pattern that has some special significance. Add a black marker outline for a final touch.


Wednesday, March 6, 2013

Scissors


There are a lot of fascinating artifacts in the Museum of Everyday Objects at Sanskriti Kendra. For centuries Indian artisans have found clever ways to decorate their utensils and tools. I thought that these ancient scissors look a little bit like bird faces, but I have to admit I was surprised that they weren't a bit more playful, since on a wall nearby there were faucets with animal heads, nut crackers carved to look like people, locks that looked like birds, etc. (see pictures below).

Make your own pair of scissors using cardboard and a brass fastener. Look at a pair of scissors. What would you do to make this pair of scissors more interesting? Brainstorm clever ways to design your own pair of scissors, consider things that open and shut, two things that might be joined together? Opposites? Things that come in pairs? Sketch an idea first so you can visualize each section. Draw the two sections side by side on shirt or recycled cardboard, remembering to leave a finger/thumb hole at the end of each section, then cut out carefully and assemble with a brass fastener. Scissor parts could be paper mached before they are attached with fastener, for a more involved project.


Tuesday, March 5, 2013

Terra cotta Horses of Aiyanar


These enormous (larger than life) horse sculptures were created by villagers so that the protector Aiyanar could ride them at night to chase away evil demons, thereby ensuring good luck for the town. Different horses from different areas were decorated with different types of objects and creatures. These horses are made, in pieces, on the wheel, seams are hidden under decorations. If you were in charge of designing your own village's horses, what sort of decorations and patterns would you put on them?

Cut a large horse out of red or brown paper, draw it first in chalk, making sure to have tips of ears, tail, nose, and hooves touch the edges of the paper. Decorate your horse using black or white marker, crayon, or chalk. Or use white or black paint and detail brushes. Would be a great clay project as well--once horse has been created, use coils and small balls of clay for all sorts of decorations. Another approach would be to collage decorations onto a painting of a horse.


Monday, March 4, 2013

Red-faced monkeys of Delhi


The kindergarten kids loved hearing my stories about the trouble-making red-faced monkeys in Delhi. The monkeys broke into the kitchen and destroyed the salad, stole Marilyn's cashews and dried fruit, followed me ominously when I was with Richard who carried oranges, and ran in the main road alongside traffic near the National Museum. The girls also enjoyed hearing about how these creatures plague the American School so much that sometimes the school hires men to bring huge but friendly black-faced langur monkeys to the yard on leashes to walk around and scare the red guys away.
We looked at pictures of the monkeys and talked about what we saw. I asked a few questions out loud and let children shout out their answers, I didn't dwell on 'right' or 'wrong' answers, but wanted to make sure they were noticing and thinking about what they were seeing. I asked 'are their eyes close together or far apart?' 'Are their mouths smiling lines or straight lines?' etc before inviting them to make these marker and colored pencil creations. They were challenged to make parts of the monkey touch the edges of the paper (and were allowed to say 'bump!' whenever their markers hit the edge, which is a great way to encourage bold drawings). Colored pencil choices were limited to a few different browns, pinks, and reds so the artists could have some freedom but not get too far off task. In subsequent lessons early finishers have been asked to make pictures in their sketchbooks of monkeys being bad. They love that assignment.


Sunday, March 3, 2013

Raja Ravi Varma embellished prints


Embellished prints of Indian deities, on view now at OJAS gallery in Delhi. RRV was a prince who created lithographs (using oils?) of Indian gods and goddesses, very colorful classic imagery, in the mid 19th century. What makes these so interesting is that at some point the final prints were embellished with fabric, sequins, embroidery thread, gold, etc. I'm a huge fan of printmaking with kids, and feel that the fun can really begin once the plate has been created and the actual printing begins. This type of embellishment would be a really great third step (carve, print, embellish) after a big printmaking project and a fun way to explore different techniques applied to exact same images. Printing could be done using linoleum, collagraphs, or styrofoam...onto sturdy paper, and then embellished once dry. Elmers glue would be good for most of the materials, and one whole class could be set aside for sewing so conflicting techniques aren't happening at once. I always encourage children to keep every print, and then choose an unsuccessful image as a beginning of a multi media exploration. In this case that could be a good starting point for this type of experimentation. Another way to approach this might be to start with color copies (also on card stock or other substantial paper) of photographs that children take, lively scenes with many people or objects would be a good starting point.